DIY Christmas Laser Light Stand and Stake
So you bought one of those Christmas laser lights, stuck in the yard and someone who shall remain nameless lost the stake or stand for it. Or perhaps like me, you were given one that didn't work, you fixed it but it didn't come with the stand or yard stake. You looked online and guess what, they don't sell replacement stakes or stands for it. Rather than toss the thing out, lets just make one of each. That's just what I did, and I'm here to share this simple project so you too can make one or the other or both yourself. It's very simple to do.
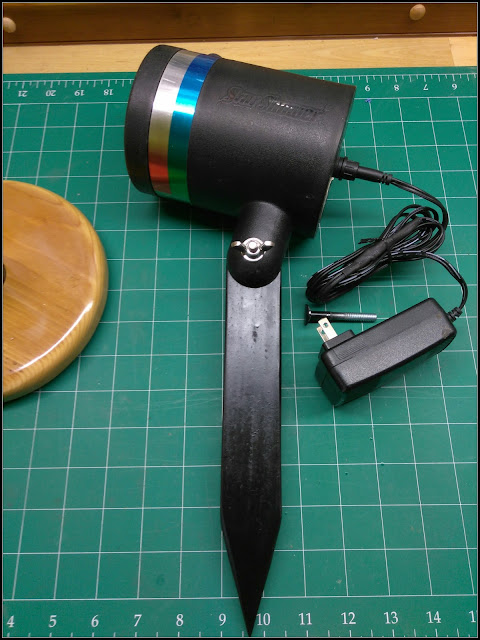
Minus the light itself - this is what we're making. A stand with post and a yard stake...
Materials list goes something like this...
1 Scrap piece of 3/4 inch by 6 or 7 inch for the base
1 Scrap piece of wooden closet rod preferably 1.5 inch in diameter by around 4 to 5 inches long for the post.
1 Scrap Pressure Treated 1x2 approximately 10 inches long for the stake.
1 1/4-20 Zinc or SS Carriage bolt 2 inch long for both stake and stand
1 1/4 inch washer Zinc or SS.
1 1/4-20 brass insert for the post
1 1/4-20 Truss head about 1 1/2 inch long
Exterior grade paint and or finish. Your choice of color and finish.
Tools - gotta have tools to do this.
Jig Saw to cut the circle base and can be used to cut all the rest too.
A Drill
1/4 inch Forstner bit or a 1/4 Brad tip bit or standard bit will do if you don't have the others.
1/2 inch Forstner bit (optional)
1.5 inch Forstner bit (optional)
A 1 inch chisel or thereabouts
Some sandpaper
The Stand
Starting with the stand base you trace or draw a circle as your cut line on a square piece of 3/4 inch wood. Either 6x6 or 7x7 or somewhere in-between. I used a coffee can to draw a circle I believe or something along those lines. You can use a compass if you have one. I didn't have one handy so - the coffee can worked for me.
Note - starting with a square piece of board just makes it easy to find the center. If not square, draw a square using the size of your circle, then draw a line from corner to opposite corner. The intersection is your center and you are going to need that to drill the holes to hold the post.
Cut the circle just outside the pencil line. Sand smooth to the pencil line.
Optionally you can do as I did, I chose to round over the top edge on the base rather than just break the edge, I think it looks good. It adds a little more work but, as mentioned, I think it gives a more finished look to the base.
If you have a drill press, it's time to break it out. Now this is optional but again it just make the stand a little more stout and finished.
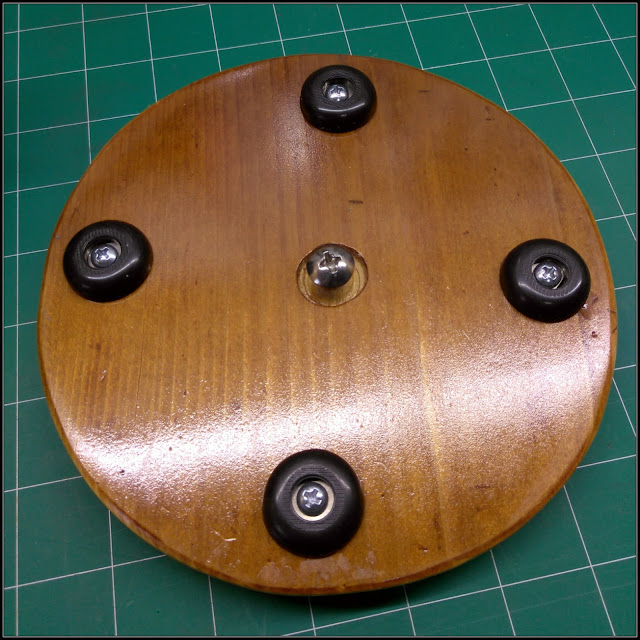
With the 1/2 inch forstner bit drill a recess for the truss head screw head on the bottom of the base. I don't have pics of me doing it but you can see what I mean in this pic...
That recess is imperative if you don't add the feet. It makes sure the screw head is below the surface of the wood. If you don't make a recess for the screw head, you'll have to add feet that are tall enough to allow clearance for the screw head for it to sit flat.
On the top side of the base you're going to do the same but with a larger forstner bit. The size of the bit is depending on what size the closet rod is you are using for the post. If it's 1.5 inch then use a 1.5 inch bit. If it's 1 3/8 inch then use a 1 3/8 inch bit. A 1 3/8 will just barely be wide enough to mate with the teeth on the light - measure your light to be sure. If you have it, 1.5 inch wood rod/dowel is better.
Again, I don't have pic while drilling or before starting to finish it but you can see the topside and the recess for the post in the image below.
I drilled the recess about 1/4 inch deep. Once drilled out, make sure the rod fits in kinda loosely but not too loose. Just enough that a piece of paper would snug it up. That will allow for it to fit snug after you apply finish to both base and post. If not adding a finish to the wood - then you want it snug.
The Post
Before you cut the closet rod to length you'll first want to make the end that mates to the light. On the light its a half diameter. You're going to duplicate that but for the opposite side... the side that the post is on.
See the top of the post in the below pic, see how it's only half round... that's what you're going to be doing - making that cut out. It's very easy to do.
Hold the closet rod up to the light and measure how long you need the cut out to be. On mine, which may be like yours, it was around 1.75 inches. So make a mark around the closet rod 1.75 inches from the end. Make a cut 3/4 deep if you are using 1.5 inch rod - 3/4 inch is half of 1.5 inch diameter, right...? Right.
You want to make the cut cross grain. You want to follow the grain when you split it from the end to that cut line. It will make it easier to split it. So again, make sure you when you cut it for length and make the cut you are cutting cross grain and the grain follows the split line on both sides.
Once the cut has been made, take a chisel - a large flat blade screwdriver if you don't have chisel, and split it from the end. Closet rods are made from hardwoods so it should split real easy and fairly cleanly.
Now either use a chisel or sand it flat and level. And now if you want you can round it over the very end as I did... I used a jig saw to cut the corners off and then just sanded it down from there
Next hold it up to the laser light where it will attach. Mark the hole to be drilled. Drill the hole using a 1/4 inch bit. It's easy if you lay the flat side on a board and drill from the opposite side I found. Use a 1/4 inch bit. That's assuming you have the same laser light I do, check to make sure your light can take a 1/4-20 bolt... if not, drill the hole to match the bolt size you're going to use.
Next cut the post to length... how long you want it is up to you. Four to five inches is a good starting point. Nothing is set in stone though.
Put the carriage bolt in with the head on the wood side. Add a washer and wing nut and crank down on that sucker till it pulls the carriage bolt into the wood till the bottom of the head is flush with the wood. See the square on the bottom of the carriage bolt - you want to drive that square into the wood. That prevents it from turning when you tighten it. Of course you could take a chisel and cut the square but the wood is soft enough it should be able to be pulled into it by tightening the wingnut up. Do this a few times removing and putting the carriage bolt back in the same spot so the square lines up and it will neaten the squared out hole it creates.
If you are not making a stake for your light you could use a curved head bolt... which is what I was going to use to begin with. Once I opted to make the stake - the carriage bolt is the better choice as it can be used in both the stand and stake and you don't need two seperate bolts. See the below pic in the difference between the curved head and carriage bolt. You can also see the square I'm referring to on the underside of the carriage bolt head I spoke of earlier.
Now finish both parts with whatever finish you prefer. I used Krylon Satin Black on the post to match the light. Three coats, let it dry a day, sand and repeat for final coat. I used Minwax Oil base Exterior grade Spar Urethane on the base. Four coats of Urethane including seal coat, sanding in-between each coat.
Once cured up - lets drill out the hole for the 1/4-20 insert.
The insert I used I picked up at one of the big box store hardware stores. Most hardware stores have them.. it's the screw in type not the hammer in type.
Installing the insert is rather easy but at the same time easy to screw up.
What I did was assemble the base and post. Push the post into the base. It might be, and should be a snug fit after finishing. Make sure you seat it all the way. Use a speed square or square of some kind to make sure the post is square to the base at 90 degree intervals. Once square, use a 1/4 inch drill bit and just kiss the post to make a mark for drilling if you are going to use a drill press for drilling the holes for the
Now - if you have means - remove it and put the post in a vise and drill the 1/4 inch hole on a drill press making sure you drill it deep enough for the length screw you are using to mount it to the base.
If you don't have a drill press handy... well, you may have to do like I did and that's drill it by hand hand held.
How I did that was after making sure it was square - put it all together upside down with the base on a flat surface with the post against the edge of table or workbench. Hold the post while you drilled the 1/4 inch hole as straight as you can eyeball. Don't go too deep, but go deep enough that allows for the truss head screw length with a little to spare. You can mark how deep it needs to be on your drill bit with a piece of tape.
Remove the post from the base. Now it time to drill the hole for the threaded insert. And this goes for either way, whether using a drill press or with hand drill.
It's very important you drill the correct size hole for the insert you're using and don't go deeper than the insert is long to make it flush with the end of the post. Check and see what size bit the insert you bought requires. USE THAT EXACT SIZE BIT... don't go over or under. Inserts don't have the greatest strength. They're brass, they're thin walled and some break easier than others when installing them.
Once you have the hole drilled for the insert you install it. And an easy way to install them is... get a 1/4-20 hex head bolt around an inch or inch and half. Put a nut on it and screw the insert on the bolt all the way so just a thread or two sticks out the end. Snug the nut up to the insert locking it in place. Use a ratchet wrench to screw it in keeping it as straight as possible. Google how to install a wood insert and there are videos on how it's done in the manner I mentioned if confused on my description of how to do it.
When it's installed it will look something like this...
Test fit everything - all good? Good! Lets put some feet on the base to finish it off.
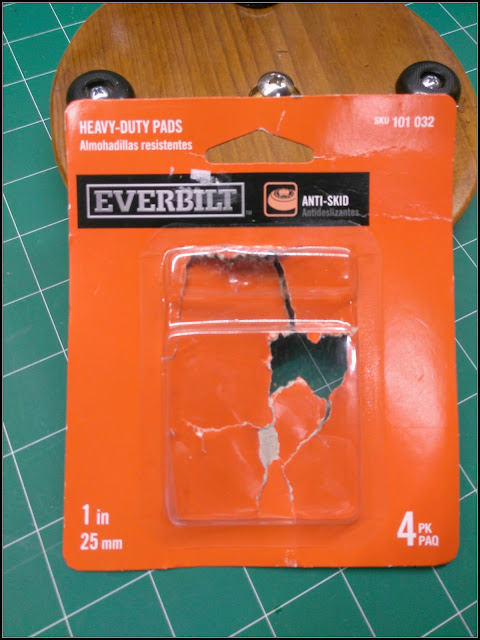
I picked up some low profile non-skid feet from the box store. Here's the package in case you want to get the same I used...
It's an easy install. Just line them up every 90 degrees around the circle. And Just so far from the edge.
That's it for the stand... just assemble it and don't forget the washer which goes under the wing nut.
Once assembled you should have something like mine below..
Now one thing that is cool about adding the 1/4-20 wood insert is - it will now also fit onto most tripods. Like my table top camera tripod...
The Yard Stake
The yard stake is easy peasy to make.
Cut a piece of 1x2 pressure treated to 8 or 10 inches. Your choice.
Cut a long point in the end. Not a 45 degree point. Just mark up 2.5 to 3 inches make a mark. Find center on the end and draw a line from center to each mark you made... there's your point.
Next draw a circle on the top. I used a Tiki Torch cap to make mine. Just find some cap that's 1.5 inches in diameter and trace around it...
Drill a 1/4 inch hole where you made the center mark. I used a 1/4 forstner bit as I have them and they make for a clean cut hole. A brad point will as well. But you can use a standard bit. No matter which use a backer piece of wood and that will help eliminate tear out on the back side.
Cut the corners with the jig saw. Sand smooth.
Now a stake with a blunt point works better than one with a sharp point. And a tapered stake is easier to hit into the ground. So do what you like but I sanded the point to a taper all the way around... its kinda like sharpening a construction pencil. Construction pencils are not round... they look like the stake if you haven't seen one...
Tapered it looks like this..
See the taper...?
And it's not super sharp... if it is, when you hit it into the ground the very tip will break off or round over making it more difficult to hit into the ground.
Do the same with the carriage bolt as you did to the post. Tighten it down till the square part is driven into the wood. Do this to both sides of the stake as either can be used for the outside side.
That's it! Stake build is done... just paint it or.. leave it as is, it's up to you. I painted mine and did so with several coats as I want it to last a bit.
Assemble and there you go.. Side A
Who says Christmas Star Lasers are only meant for Christmas time?
They look great year round. Put away till the next backyard party or get together I say!
Speaking of which, I picked up a used ION Party Rocker Express and repaired it, Took it and the laser light over to the backyard of a friend of mines house which I had revamped. Set up the laser light, the party rocker express, light all the tiki torches plugged in some found white christmas lights on a discarded X-Mas tree which I wrapped around a couple palms... and wah lah... instant outdoor party/ cook out atmosphere.
Here's a video the home owner shot on her iPhone. Audio didn't come through the best but it sounded great in person. And if you listen closely you can hear the possums objecting and getting all pissy as the path was walked. They didn't mind the lighting or music - just our presence. lol
Youtube compressed the heck out the video. Perhaps Vimeo can do better, lets see...
Yup - damn sight better! Gotta love Vimeo for that!
Well I hope you found this an easy project to complete. The next project though easy, it's a tad more involved. And a lot more fun for someone in the end. You'll see...
Till next time,
Stay creative and above all else, Stay Happy!
cheers...


Comments
Post a Comment