Vintage Shoe Bench
Another seemingly small project I worked on over the past months was this vintage shoe bench I rescued from making it's way to the land fill. I'm not going to get long winded about this project though I will go over a little back story and what it took to get it to the state you see above, which proved no easy task.
The back story is a friend of a friend parent passed away. They were getting the home ready for sale tossing out what they didn't want to keep. And I was asked to come look at some furniture she wanted refurbished/refinished either her Father or Grandfather had made.
I have to say at this point, I truly don't think people really know what goes into refinishing or refurbishing. They watch a 15 minute video on YouTube and think; "Heck that's easy! It only takes 15 minutes." Trust me when I say there's a lot more work involved and a certainly a lot more time. Or don't trust me and attempt the work yourself on something even as simple as the above shoe stand or a end table. To do it right, you're going to put some time into it. More than you think.
The furniture in question was made by I believe her father or grandfather. It was quite old but in the end, for me to do the work, even as a friend of a friend, or if I had the facility to do such work which I don't, it was going to cost her more than it was worth to her. So be it. But in passing a large construction dumpster I saw what I originally thought was an end table. I could see it was made of oak and thought I'd give a shot at refurbishing it. Again this was something made by a family member of hers. I asked if I could have it and a wooden bucket that was in there as well.
"Sure, take what you want." she responded. And so I did.
As mentioned it is made of what I believe to be White Oak. Top was split in several places as well I found so were parts of the legs. So I set out to strip it, reglue the splits and make repairs.
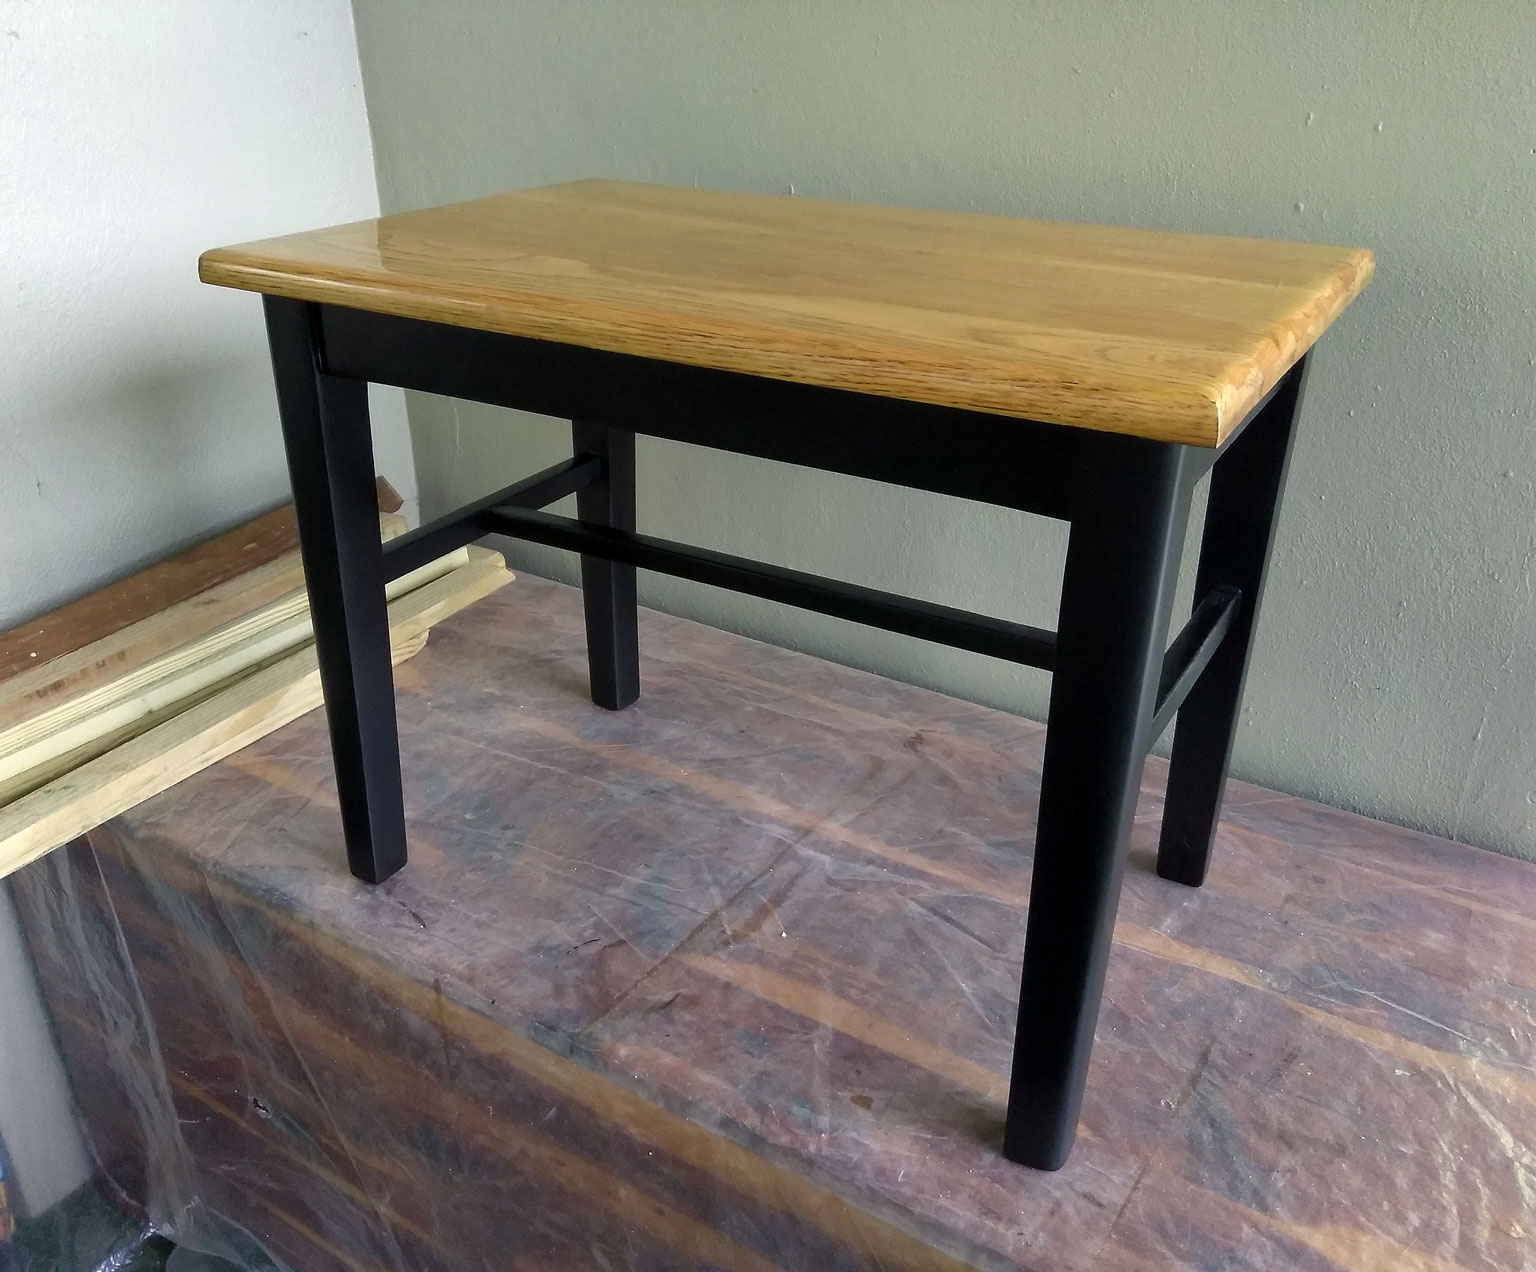
Given some thought about what finish I would give it, I decided to try an ebony stain on the legs and underside of the top. That was the plan anyway.
The oil based ebony stain just would not take well. Or at least not to my satisfaction. Even after several coats. It wasn't black enough and I couldn't get it to even out for whatever reason. Here is the top after 3 coats of stain. Not bad, just not what I wanted.

Here you can see some repairs needed I discovered after staining. It was starting to prove honory.

Nothing was even stain wise. So, I stripped it down again. And went with Krylon Satin Black indoor outdoor paint. After three coats of Satin Black I was very pleased with the finish. It was nice and even and the color density and contrast I was looking for.
Then I discovered the legs where worn uneven. Arrrgh! How could I miss that! So I had to cut the legs at the bottom to get it to stop teeter totting. And repaint those areas.
Onto the the topside of the top. Did I mention this was old? Split? Worn in areas? Uneven? Not flat? yeah well - it was all of the above including slightly warped. Again something I did not check prior. And it being Oak, it was a pain to sand flat by hand. And one board had extra wide grain. It was probably made from scrap wood from other projects he had done.
I tried filling the grain... and filling the grain... and filling the grain. I could not get the finish to lay right. It just kept sucking that oil based urethane up. And I'm pretty good at finishing. This top was not going to win! So I came up with some new cuss words and kept going. I think somewhere in the neighborhood of 16 to 20 coats of finish was applied before I was okay with it.
Wet sanded it to 3000 and gave it a polish to get close to a mirror finish.
A friend of mine liked it - I was pissed off just looking at it - so I gave it to them. Being self critical there were issues that could've been and should've been seen and corrected from the start I over looked that caused more work. A lot more work. Looking at it reminded me of my own stupidity at trying to rush and get it done.
I've seen it since and I'm not so upset with it. Everyone likes it that see's it, but for me, there's still that stigmata from the battle. lol I put a lot, I mean a lot of time into this piece. Way more time and finish product than I ever intended to start with.
Here are some before and after pics:


Another pic of the finished shoe bench...


That wasn't too long winded was it? lol
If you made it this far here's a little bonus restoration I did to a completely rusted up pipe wrench...

It's either a 8 or 10 inch pipe wrench, I can't recall at the moment as to which exactly. To restore it I simply let it soak in white vinegar overnight, then put a wire wheel to it before masking it off and painting it with red enamel paint. It came out great. It's not perfect as it has some pitting but hey, it's a heck of a lot better than it was when I recieved it. I didn't have one, now I do.


Well that's it for today folks, if you've read any of my past posts you know the drill...
Till next time,
Stay Creative, Stay Happy!
Cheers...
Comments
Post a Comment