Dressing Up an Inexpensive Tent
These mods aren't expensive. But with less expensive gear and how they are constructed, these mods should help prolong the life and cut down on wear and tear. As well, lighten them up a tad or two.
Most of the less expensive tents use a Pole Pin and Ring assembly for attaching the fiberglass poles to the tent. One of mine came with Aluminum short and the other came with Steel Long Pole Pins (which were too long btw). If yours has Steel. trade them out for Aluminum. This will lighten them up a tad by over 2grams each one you change out.

Next, I dressed up the Poles. If you set up your tent and push your poles through the sleeve (pocket) you'll notice it catches every time the next section passes through. So lets dress up the pole to help decrease this and save some wear on the pocket nylon.
This is done easily with Heat Shrink Tape. 10mm Heat shrink will work on both the 5/16 and 1/4 poles. And a roll at Harbor Freight will cost you $3 maybe. Plenty to do this and a dozen or more tent poles.
What you want to do is take a couple inches and do as I did below. You're covering the sheath end that is attached ( glued) to the pole. Not the end the next one inserts into!
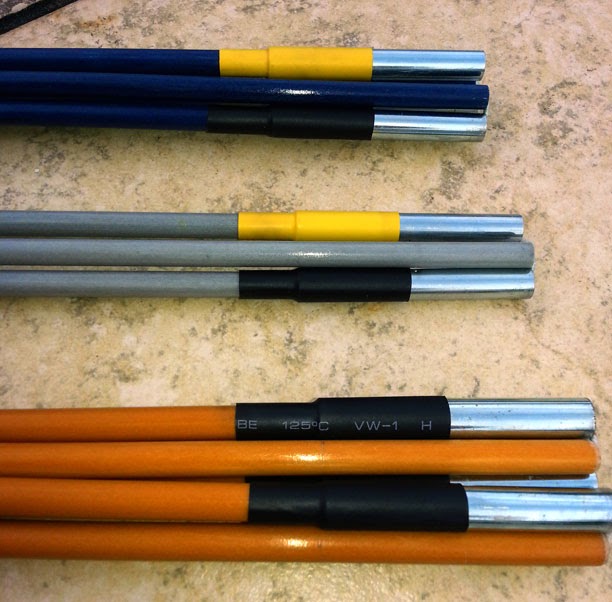
You'll notice on the above 1/4 poles I used yellow and black heat shrink tape. I used the Yellow to show which are the ends of the poles. Black heat shrink tape for the rest of the sections. I had it on hand for the 1/4 inch poles but not the 5/16 inch poles (orange). Other wise I would have done it to that one as well. But the end caps I'll be talking about next signal which are the ends as well so if you don't have two colors, don't sweat it.
Next thing I did to the poles was to add a end caps to the end section. This again saves wear and tear on the tent pocket as these are the first sections to go through the pocket and over time will wear a hole in the nylon or cause it to tear easily were it rubs in the pocket. It also prevents dirt from getting into the end when handling it once it's together should the pole be stabbed into the ground when pitching or tearing down your tent.
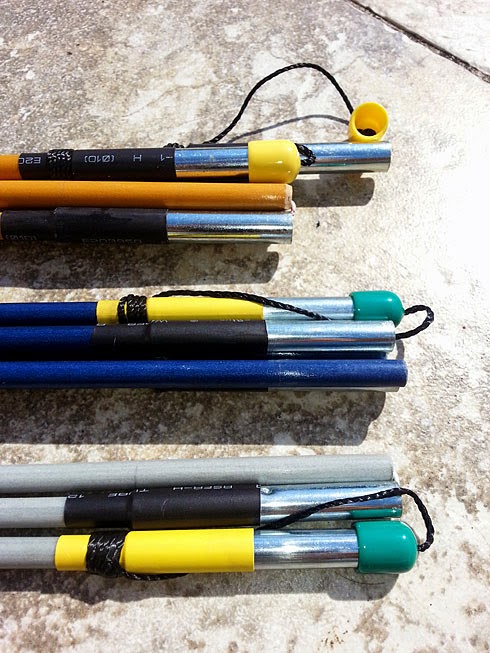
To make these it's real easy. Use Screw Covers. Home Depot and Lowes and perhaps even Ace have them. Use 3/8" for the 5/16 poles and 5/16 scew caps for the 1/4 poles. Both are show above. All above done for less than $2. They come 2 to a package so figure you'll need one pack per pole.
The string I added was so I don't loose them. Again real easy. I used Poly string. Made a knot around the pole below the sheath as you can see. Took a needle and ran it through the cap. Tied a knot in the end so it wouldn't come back through. Simple. Just make sure you allow enough string length so you can easily put it on. Make the string too short, you won't get it on. Also a dab of clear nail polish or super glue over the knot will keep it from unraveling.
Now that the poles are done. Grab a metal free hair tie and put it on each pole set. This keeps them nice and neat in the pole bag. Once out of the bag your not having to untangle them. You'll appriciate this if your tent is a three or 4 or more pole tent. That done put them away as we are done with them for now.
Now lets go back to the Pole Pins and dress them up a bit.
You'll notice when you insert the pole pin into the pole, it's loose. Real loose. I don't like that so I added some polyethylene tubing to the Pole Pin as you can see below.
Again under a buck to do all and it only cost that much as Ace only sells cut tubing in 6 inch increments.
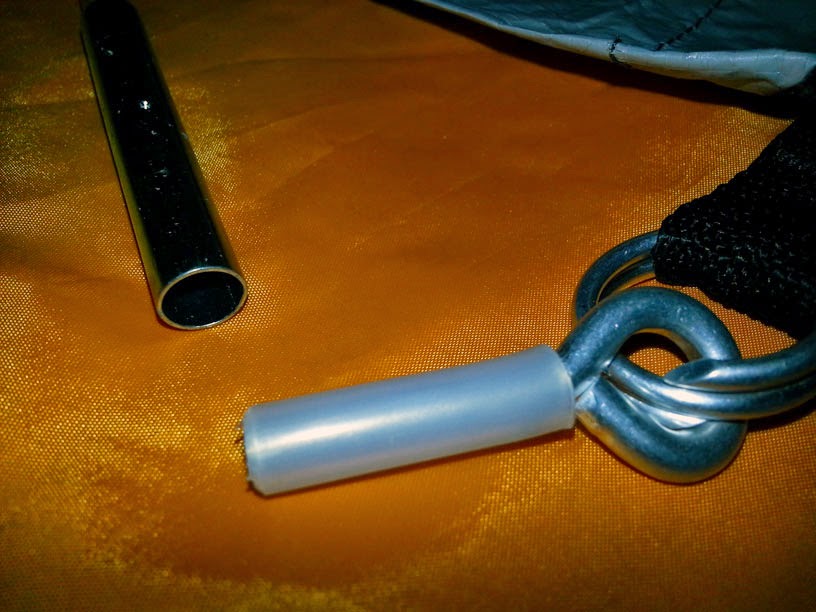
Make sure you 45 the ends and get rid of any burs, don't leave sharp edges on the exposed end. When you pack your tent this might cause some undo wear on your tent even though the poly tubing is not rock hard.
Above is the 5/16 tubing which I believe is 3/8 tubing. but bring your pin and your pole with you to the store to check fit.
You may have to heat up the tubing to slide it on your pins - just use a coffee mug with some hot water and let it soak for a minute. Then slide it on.
Once done, you can see the fit of the pin into the pole is a lot better.

That's pretty much it for dressing up the tent poles and pins.
Sealing the Seams
Next I usually do a quick set up of the tent and check the seams for any obvious pin holes. Then seam seal them if not already taped. Taped seams you don't have to worry about right off, other wise, it might be wise to go ahead and seam seal your seams right off the bat.
There are several good seam sealers on the market, some for silicone treated tents and others for those not treated with silicone. My tents are not treated with silicone.
I just did another small tent I have using Seam-Grip. Which is supposed to be pretty good and can be used for taping your seams as well as just sealing them. Keep in mind when seam sealing, you're not trying to re-seal the whole tent with this stuff. You only need a thin layer over the thread area, about a quarter inch is what I did. The size of the small brush that came with the sealer.
Area's you want to focus on - or at least I did/do - are areas that are known to commonly leak on tents. Such as:
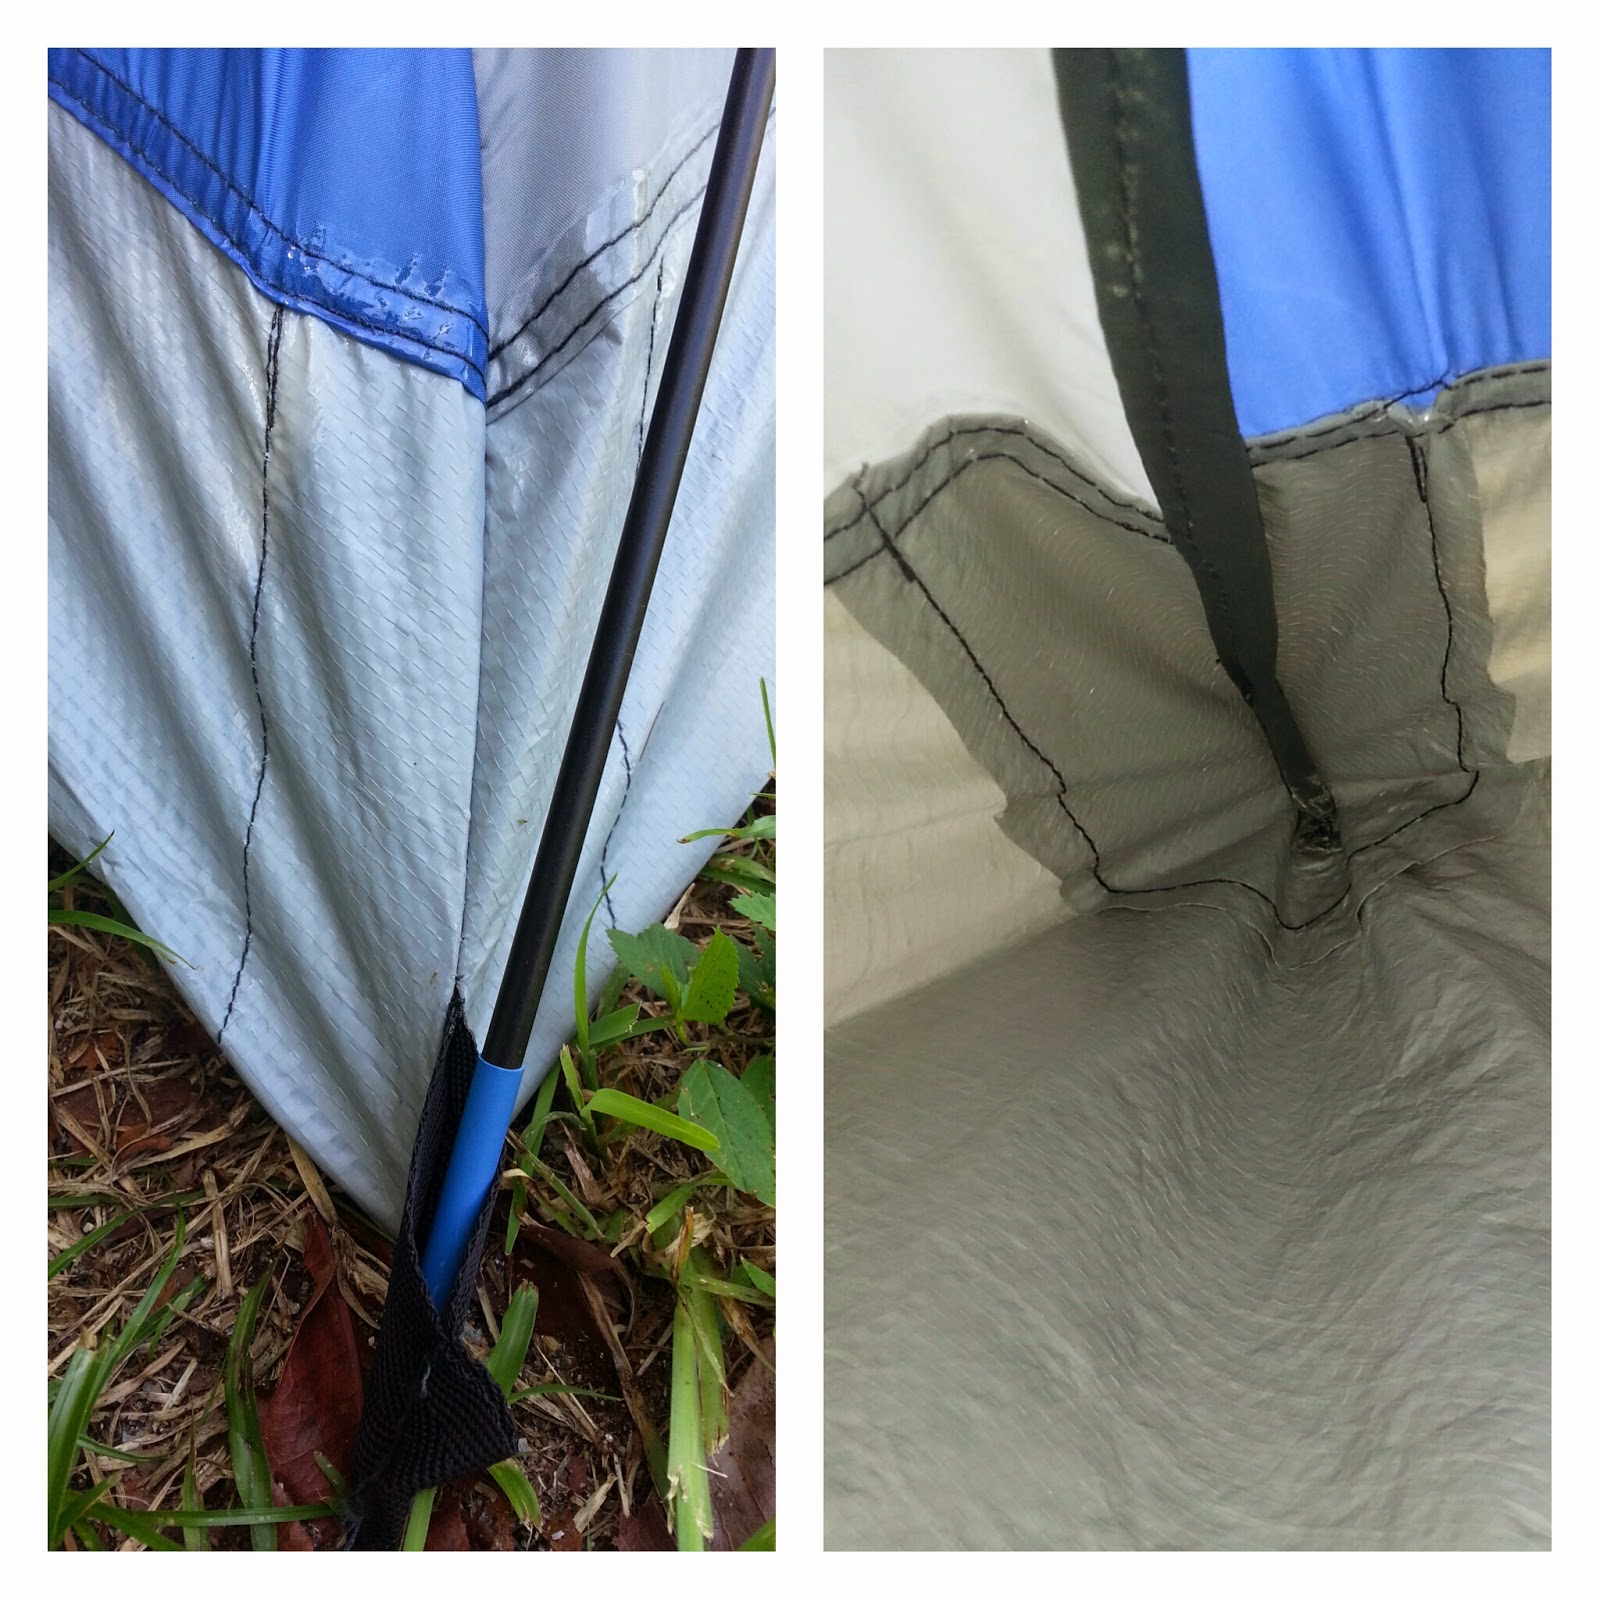
Outside stake tabs where they are sewn to the tent, corners inside and out. Note the inside seam has a little extra material in the image to the right. I treated that extra material as I would seam tape. I put a thin coat of Seam-Grip under it and let it cure for a bit (5 minutes since it was humid) and put another thin layer of sealer on top brushing the sealer over the threads and edge of the extra material. It will lay flat as you brush it on the top portion and stick nicely.
 Pole Pockets, the perimeter seams and zipper seams.

A note on the zipper seams, don't get sloppy and get the sealer in the teeth! If you do, wipe it off immediately.
Insect Repellant
When the seam sealer is dry, in my case 24 hrs after apply the seam sealer. Last thing I did/do is spray the tent with bug spray.
I haven't used it before but this time I used Sawyers Permethrin Spray.
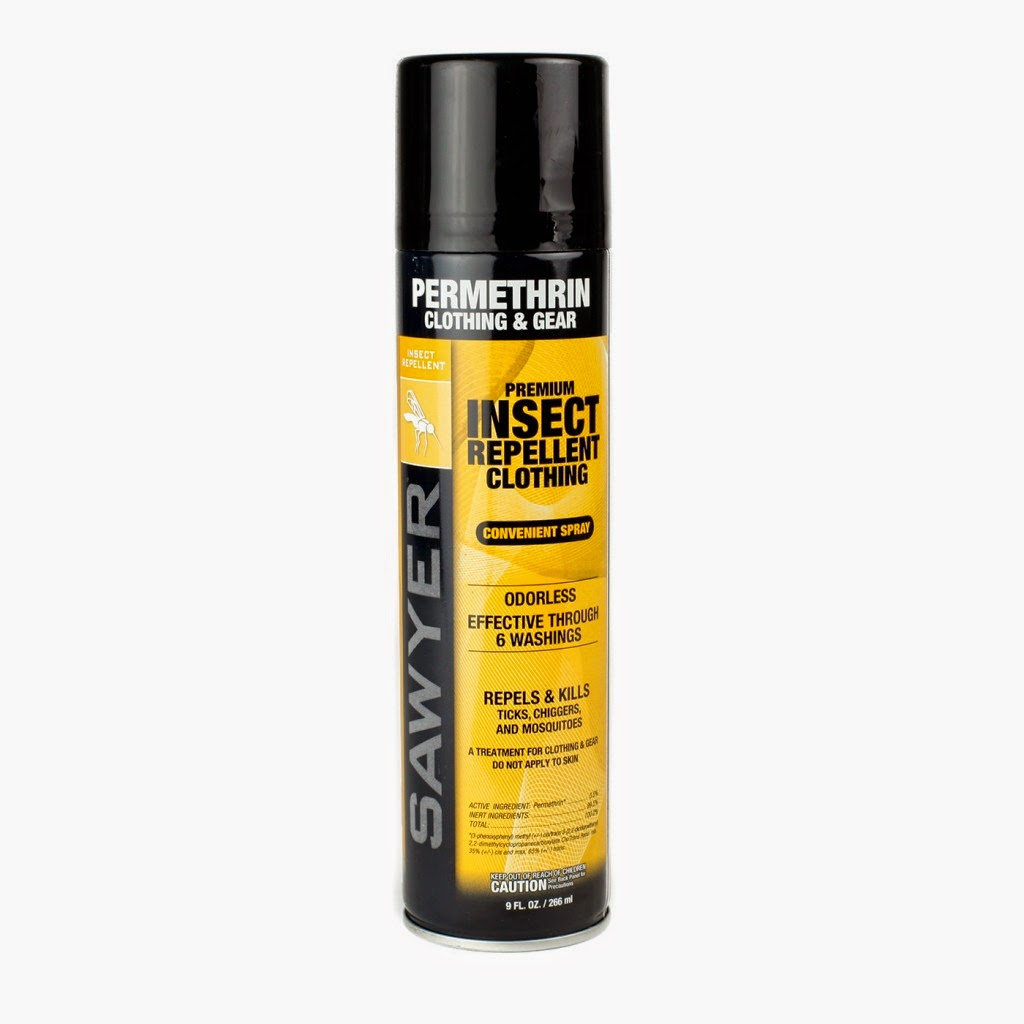
It's designed for Outdoor clothing, bags, tents, plastics, etc. And supposedly lasts for up to six washings or 6-10 weeks.
According to the can, it repels and kills Mosquitoes, Ticks, Chiggers, Mites, and more than 55 other kinds of insects on contact.
Read more about it at the manufactures site via the link I provided above.
Personally, I don't spray the whole tent. With this or any other Bug spray. Nor do I spray the inside of the tent for the most part. I don't like the idea of laying in poison. And always do this in a well vented area no matter what you use. You don't want to suck this stuff or any other into your lungs if you can help it, let alone spray the Permethrin on your skin. This takes about 4 hrs to dry acording to Sawyer though I gave it 8 before striking the tent and ground cloth for packing.
What I spray on the tent is:
and that's it.
DO NOT SPRAY the inside of your tent, especially with this stuff from what I read.
Nor the inside of your jackets or sleeping bags or pillows.
I do spray my entire ground cloth pretty much on the cloth side - well about a foot and a half all the way around.
As well the exterior of my shoes, and exterior of my backpack. I do not spray my backpack where any part of my body rests against such as my back padding or the shoulder straps.
Weak Tent Poles
I wanted to just touch on this as you may run into this with in-expensive tents. Weak tent poles.
An example of this is is on the Kiddie tent I just treated. Once staked out you can see the tent poles have collapsed somewhat on the right side especially in the below image.

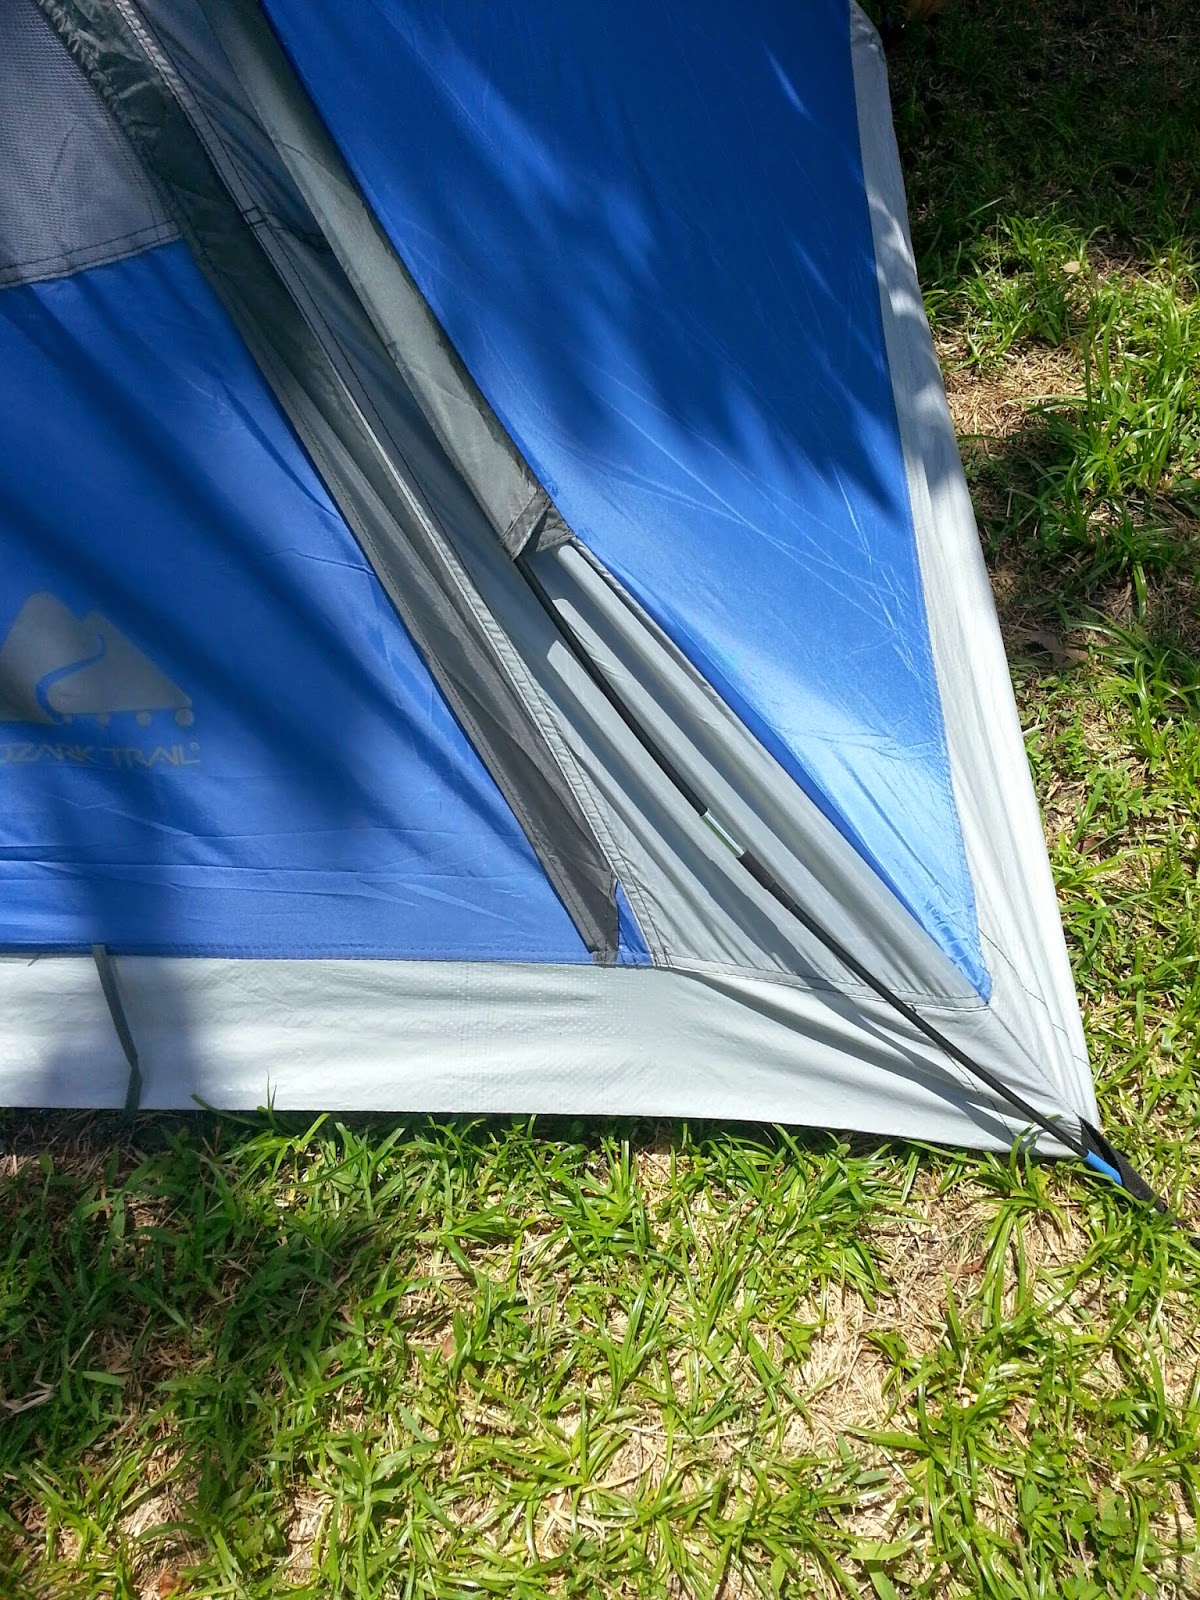
The poles are not too long - they are simply just too weak of a pole at this length to hold its shape.
You can also add and stake out a short guy line from the first knuckle to hold it out or go with it as it is temporarily.
So don't freak out if you see this or go cutting your poles thinking they are too long. It's a simple matter of getting a larger size pole or upgrading to Aluminum or Carbon poles
Next post I show you my DIY ground cloth but for now my inexpensive tent is looking pretty good.
Well, thats all till next time.
If you're not enjoying what your doing, it just might be time to go do what you enjoy.
Either Rendering or Road trippin'
Enjoy yourselves
~ chase ~
Most of the less expensive tents use a Pole Pin and Ring assembly for attaching the fiberglass poles to the tent. One of mine came with Aluminum short and the other came with Steel Long Pole Pins (which were too long btw). If yours has Steel. trade them out for Aluminum. This will lighten them up a tad by over 2grams each one you change out.

Next, I dressed up the Poles. If you set up your tent and push your poles through the sleeve (pocket) you'll notice it catches every time the next section passes through. So lets dress up the pole to help decrease this and save some wear on the pocket nylon.
This is done easily with Heat Shrink Tape. 10mm Heat shrink will work on both the 5/16 and 1/4 poles. And a roll at Harbor Freight will cost you $3 maybe. Plenty to do this and a dozen or more tent poles.
What you want to do is take a couple inches and do as I did below. You're covering the sheath end that is attached ( glued) to the pole. Not the end the next one inserts into!

You'll notice on the above 1/4 poles I used yellow and black heat shrink tape. I used the Yellow to show which are the ends of the poles. Black heat shrink tape for the rest of the sections. I had it on hand for the 1/4 inch poles but not the 5/16 inch poles (orange). Other wise I would have done it to that one as well. But the end caps I'll be talking about next signal which are the ends as well so if you don't have two colors, don't sweat it.
Next thing I did to the poles was to add a end caps to the end section. This again saves wear and tear on the tent pocket as these are the first sections to go through the pocket and over time will wear a hole in the nylon or cause it to tear easily were it rubs in the pocket. It also prevents dirt from getting into the end when handling it once it's together should the pole be stabbed into the ground when pitching or tearing down your tent.

To make these it's real easy. Use Screw Covers. Home Depot and Lowes and perhaps even Ace have them. Use 3/8" for the 5/16 poles and 5/16 scew caps for the 1/4 poles. Both are show above. All above done for less than $2. They come 2 to a package so figure you'll need one pack per pole.
The string I added was so I don't loose them. Again real easy. I used Poly string. Made a knot around the pole below the sheath as you can see. Took a needle and ran it through the cap. Tied a knot in the end so it wouldn't come back through. Simple. Just make sure you allow enough string length so you can easily put it on. Make the string too short, you won't get it on. Also a dab of clear nail polish or super glue over the knot will keep it from unraveling.
Now that the poles are done. Grab a metal free hair tie and put it on each pole set. This keeps them nice and neat in the pole bag. Once out of the bag your not having to untangle them. You'll appriciate this if your tent is a three or 4 or more pole tent. That done put them away as we are done with them for now.
Now lets go back to the Pole Pins and dress them up a bit.
You'll notice when you insert the pole pin into the pole, it's loose. Real loose. I don't like that so I added some polyethylene tubing to the Pole Pin as you can see below.
Again under a buck to do all and it only cost that much as Ace only sells cut tubing in 6 inch increments.

Make sure you 45 the ends and get rid of any burs, don't leave sharp edges on the exposed end. When you pack your tent this might cause some undo wear on your tent even though the poly tubing is not rock hard.
Above is the 5/16 tubing which I believe is 3/8 tubing. but bring your pin and your pole with you to the store to check fit.
You may have to heat up the tubing to slide it on your pins - just use a coffee mug with some hot water and let it soak for a minute. Then slide it on.
Once done, you can see the fit of the pin into the pole is a lot better.

That's pretty much it for dressing up the tent poles and pins.
Sealing the Seams
Next I usually do a quick set up of the tent and check the seams for any obvious pin holes. Then seam seal them if not already taped. Taped seams you don't have to worry about right off, other wise, it might be wise to go ahead and seam seal your seams right off the bat.
There are several good seam sealers on the market, some for silicone treated tents and others for those not treated with silicone. My tents are not treated with silicone.
I just did another small tent I have using Seam-Grip. Which is supposed to be pretty good and can be used for taping your seams as well as just sealing them. Keep in mind when seam sealing, you're not trying to re-seal the whole tent with this stuff. You only need a thin layer over the thread area, about a quarter inch is what I did. The size of the small brush that came with the sealer.
Area's you want to focus on - or at least I did/do - are areas that are known to commonly leak on tents. Such as:
Outside stake tabs where they are sewn to the tent, corners inside and out. Note the inside seam has a little extra material in the image to the right. I treated that extra material as I would seam tape. I put a thin coat of Seam-Grip under it and let it cure for a bit (5 minutes since it was humid) and put another thin layer of sealer on top brushing the sealer over the threads and edge of the extra material. It will lay flat as you brush it on the top portion and stick nicely.


A note on the zipper seams, don't get sloppy and get the sealer in the teeth! If you do, wipe it off immediately.
Insect Repellant
When the seam sealer is dry, in my case 24 hrs after apply the seam sealer. Last thing I did/do is spray the tent with bug spray.
I haven't used it before but this time I used Sawyers Permethrin Spray.

It's designed for Outdoor clothing, bags, tents, plastics, etc. And supposedly lasts for up to six washings or 6-10 weeks.
According to the can, it repels and kills Mosquitoes, Ticks, Chiggers, Mites, and more than 55 other kinds of insects on contact.
Read more about it at the manufactures site via the link I provided above.
Personally, I don't spray the whole tent. With this or any other Bug spray. Nor do I spray the inside of the tent for the most part. I don't like the idea of laying in poison. And always do this in a well vented area no matter what you use. You don't want to suck this stuff or any other into your lungs if you can help it, let alone spray the Permethrin on your skin. This takes about 4 hrs to dry acording to Sawyer though I gave it 8 before striking the tent and ground cloth for packing.
What I spray on the tent is:
- The screen mesh from the inside out. Just the screen and maybe an inch beyond the edge.
- 8 inches around the screens on the outside of the tent. And with screen windows and doors zipped up - the entire screen again.
- A 4-6 inch path all the way around the tent on the outside starting from the ground up.
- As well on the outside, around a 4-6inch path around the door.
and that's it.
DO NOT SPRAY the inside of your tent, especially with this stuff from what I read.
Nor the inside of your jackets or sleeping bags or pillows.
I do spray my entire ground cloth pretty much on the cloth side - well about a foot and a half all the way around.
As well the exterior of my shoes, and exterior of my backpack. I do not spray my backpack where any part of my body rests against such as my back padding or the shoulder straps.
Weak Tent Poles
I wanted to just touch on this as you may run into this with in-expensive tents. Weak tent poles.
An example of this is is on the Kiddie tent I just treated. Once staked out you can see the tent poles have collapsed somewhat on the right side especially in the below image.


The poles are not too long - they are simply just too weak of a pole at this length to hold its shape.
You can also add and stake out a short guy line from the first knuckle to hold it out or go with it as it is temporarily.
So don't freak out if you see this or go cutting your poles thinking they are too long. It's a simple matter of getting a larger size pole or upgrading to Aluminum or Carbon poles
Next post I show you my DIY ground cloth but for now my inexpensive tent is looking pretty good.
Well, thats all till next time.
If you're not enjoying what your doing, it just might be time to go do what you enjoy.
Either Rendering or Road trippin'
Enjoy yourselves
~ chase ~
Comments
Post a Comment