The FreeBird I - first model for 2014

Commonly called simply the "FreeBird", it's an ornithopter design by Nathan Chronister sometime between 1993 and 1998. Modeled to scale, rigged and animated in Cinema 4D R13.
I chose to call it FreeBird I, since Nathans original design of the Freebird published in Flapper Facts in 1993 is significantly different than this one and the Freebird II he came out with in 1998.
At any rate, they are all rubber band powered ornithopters, the FreeBird I with a 16 inch wing span uses a staggered crank with a front 4-bar linkage. You can see a full size multi view image of the Freebird in my CG Arena port.
Actually I did model another one first based on both the original and the above Freebird I design using a standard crank method. You can see the difference in crank design below:

The FreeBird I is something that many have already built in real life. They are fun to fly and fly for around 30 seconds from what the instructions state, but as you'll see in the video further down the page, it can fly longer and very high!
Here is a pic of a real life FreeBird I:
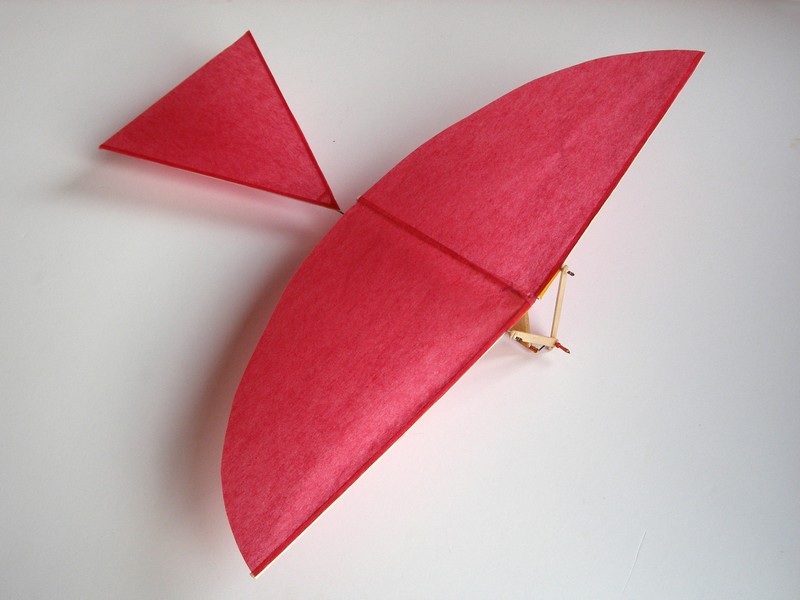 |
| FreeBird I Picture courtesy of http://www.zininmodelvliegen.nl |
FreeBird - the original D.I.Y. Ornithopter plans
And to inspire you here is a short video of a real world FreeBird made from the above plans in flight:
One of the tricks to making staggered crank at least in 3D was to add a circle as a map so to speak.

You see the center point of the crank (center bullseye) to the outer crank points and them to each other forms a perfect isosceles triangle. All sides of the triangle are equal distance. This is key for this type crank design to work properly.
If done correctly it should look like this from the front when turning.

As you can see the wings flap in sinc using a staggered crank design.
Here is another view of the staggered crank on the FreeBird I I modeled from both side and front views:
The other simple style crank - the one where both connecting rods are on the same crank position will work, but as they state will result in asymmetrical wing cycling and arbitrary flight in a circle of your ornithopter.
I haven't tried either real world, but that's what I'm reading.
You can see in 3d at least, how the wings will flap asymmetrically in the below rig:
Modifications:
Since modeling mine, I've already starting thinking of how I want to modify it. One such modification I did after my initial modeling of FreeBird I, was to add a small groove in the wing spar to add further support and strength to the connection of the wing spar wire and spar itself. Be more resistant to twist I'd think.
 |
| Render of a modification to the wing spar. |
I haven't tested this modification in the real world, but I don't think it will hurt the design, but rather strengthen it. But... as stated, it is untested at this point. So do it at your own risk if building it for real. In the 3D world, they all fly great! At least in the software I'm using thus far. Just have them follow a spline and they fly how ever you want them too. Perhaps Cinema 4D R14+ it may have real world aerodynamics... don't know yet.
Another mod that I was leaning towards, is adding an mini electric motor and gear set up on the front. Getting rid of the rubber band all together. At least for rendering and animating as the rubber band is super poly rich and slows the heck out of my comp.
I've come up with several other mods as well since, and probably will have even more as I create more of these flying machines.
I even thought of making a Steam Punk version as well as well as other wacked out ones. Lacking the rubber band, as is, the FreeBird I is pretty light on polys and animates really well.
I made a bunch of different wing cover textures for it, so I can mix and match them. Just as you can in the real world.
See you in the next post,
- chase -
Comments
Post a Comment